Tuesday, November 26, 2013

Trim Healthy Tuesdays: Chicken and Cauliflower Casserole S


    There's a few Chicken and Cauliflower casseroles, floating around the THM Pinterest pages. I really like the look of this one but I decided to give it a few little twists of my own! If your chicken is pre-cooked like mine (I usually make a big batch of chicken in my electric pressure cooker once a week and then store it in the fridge for quick meals) this meal will take about thirty minutes total for prep and cooking!

 photo ChickenandCauliflowercasserolePin.jpg

     Ingredients:
3 chicken breasts cooked and shredded
1 16 oz. pkg frozen cauliflower (you could use fresh if you have it)
2 cups shredded cheese (I used a cheddar and mozarella mix)
2 cloves garlic chopped
2 tsp onion powder
3/4 cup mini pepperoni (you could used chopped turkey bacon or sausage if you are opposed to pepperoni)
1/2 cup cream 
1 egg
salt, pepper and dried parsley flakes

Preheat oven to 350 mix all the ingredient together except for the 1/2 the cheese and the dried parsley.I did not thaw the cauliflower I just mixed it in frozen. 


 Place in a glass baking pan (I didn't grease mine, I found there was enough liquid in the frozen cauliflower that it didn't stick.) and top with extra cheese and parsley flakes. I cooked mine uncovered for 30 minutes until the everything was hot and bubbly. (cooking uncovered allows the frozen cauliflower to release some moisture into the stove without causing a very wet dish)


 This meal turned out VERY yummy and everyone ate it!! It served our family of 6 (including the baby) with 3 family members having seconds and no leftovers!
    
It was a super simple, yummy and fast!! Can't beat that! =)


This post is linked up on Trim Healthy Tuesdays

Monday, November 25, 2013

A Very Merry Advent and all about the Truth in Tinsel

In compliance with the FTC regulation, I am disclosing that this post contains affiliate links. Thank you!


As Christmas approaches, lots of families with small children are looking for ways to keep Christ as the focus of the Holiday season. Let me tell you about a great resource we have found to do just that!

    
     I am very excited for the Holidays this year. Between birthdays (5 of them) and holidays, November and December are very full months for our family!


 photo 100_0063.jpg
a Christmas walk by the river last year


      Last year was our first Christmas in the South and we really didn't do much to celebrate. I had just had a baby by C-section the month before, our stove was not working, and the house was still covered in boxes. We didn't put up a tree, or make a big meal, we mostly sat around, watched the kids open a few presents, and thanked God that we had SURVIVED the past year!

    
 photo 100_0103.jpg
a little Southern Holiday joy!


     But, really I love the Holiday season! I'm used to cold December's with a little snow and a lot of Christmas in the air. We would all get dressed up in our warmest coats and hunt down the best tree at the tree farm. Or go drive through one of the coolest lights displays around. But now we look outside and see the green of a Southern Christmas and we begin to make some NEW family traditions!

     One tradition that we are keeping and brought with us is the Truth in Tinsel e-book!! This really is the perfect e-book to help your little ones focus on Christ this season, when there are so many things that are turning their little hearts to think of gifts and sweets!


 photo 100_0152.jpg
My Thanksgiving, Birthday, and Christmas present was all rolled up into one last year!


      Truth in Tinsel gives you a craft for each day to make and hang on the tree while discussing a Scripture and a Biblical event leading up to the birth of Christ! It comes with directions and print-ables and the crafts are very easy for little hand to put together. There is also a companion set of printable ornaments (link on the top right-hand side of this page, it says "Busy Day? Printable Ornament") you can purchase that will give you a quick craft for those days when you've got a lot going on!

     We are planning to set up our Christmas tree the day after Thanksgiving, and then spend the month of December decorating it with our Truth in Tinsel ornaments! Then, by Christmas the tree will be complete and remind us of all the gifts God has given us through His word that we can celebrate this Christmas. 


I'd love to hear ways your family keeps the focus on Christ for the Holidays!


Wednesday, November 20, 2013

Putting On The Spirit : 10-Minute Devotions for Busy Moms and a Giveaway!

     I wanted to share with you all about a new e-book I am happy to be part of the Launch Team for! Katie Hornor is a blogger over at Paradise Praises, who has written a new devotion book (expected release date is Dec. 9th) for mom's called, "Putting On the Spirit: Ten-Minute Devotions for Busy Moms". I was thankful to be one of the bloggers chosen to receive a free copy to review!

From Paradise Praise's: "Katie and her husband Tap have been missionaries in Mexico since 2007. They homeschool their four children and minister through church planting, Bible training, bookstore ministry, and homeschool curriculum development.

Katie is a teacher at heart, and by trade, and loves to encourage women in their God-given roles through speaking, writing and blogging. She is the author of this and two other e-books as well as the Lemonhass homeschool curriculum for Spanish Speaking families."

     I've gotten a chance to use this devotional myself over the past few weeks and have been enjoying taking a deeper look into some of my favorite Bible verses (1 Corinthians 13 and Galatians 5:22). These devotions are quick and eay to fit in to your busy day. Certainly you also could take longer than 10-minutes, if you have more time available, to go through the verses and questions more in depth.


The Putting on the Spirit Launch Team is excited to help Katie celebrate the release of her new book with a special giveaway of  books that will encourage, equip, and inspire any mom.  One winner will win all of the books listed below (a $120 value), plus 3 more winners will win a digital copy of Putting on the Spirit.

We would like to thank the following friends for their generous sponsorship of this giveaway! Be sure to stop by their websites to say thank you!

Heidi St. John, The Busy Mom
Home School Adventure Co.
Great Waters Press
National Center for Biblical Parenting
Sally Clarkson
PhyllisSather.com
Raising Arrows


Here's what you can win --

Putting on the Spirit: Ten-Minute Devotions for Busy Moms eBook by Katie Hornor

Loving You Long Distance eBook by Katie Hornor

Divine Design eBook by Katie Hornor

Purposeful Planning eBook by Phyllis Sather

The Busy Homeschool Mom's Guide to Romance by Heidi St. John

Desperate: Hope for the Mom Who Needs to Breathe by Sally Clarkson and Sarah Mae

Raising Real Men by Hal & Melanie Young

My Beloved and My Friend (release date of Feb 2014) by Hal & Melanie Young

The Christian Parenting Handbook by Dr. Scott Turansky and Joanne Miller, RN

Philippians in 28 Weeks by Stacy Farrell

The Wise Woman Literary Analysis Journal Questions by Stacy Farrell

Streams in the Desert eBook by L.B.E. Cowman

The Homemaker's Guide to Creating the Perfect Schedule eBook by Amy Roberts


To enter the giveaway, use the Rafflecopter at the bottom of this post. One winner will be selected and announced by noon ET on December 13, 2013. U.S. residents age 18 and older only please. Other Terms and Conditions can be found in the Rafflecopter.


a Rafflecopter giveaway


In addition to this great giveaway, Katie is offering her book, Loving You Long Distance, free for Kindle for 5 days -- November 19-23. Be sure to click over and grab that one after you enter the giveaway!

 
I hope you enjoy these books from Katie as much I have been!

Tuesday, November 19, 2013

Trim Healthy Tuesdays: Smokey Sweet Potato Pancakes E


Another recipe with sweet potatoes!! I admit I wasn't a big fan of sweet potatoes other than with Thanksgiving dinner (and the one time I baked a sweet potato pie, which was AWESOME, but very VERY sweet!) Now I have been working on some new ideas for sweet potatoes!
 photo SweetPotatoPancakePin.jpg A few weeks ago, I showed you my Sweet Potato Pasta with Chicken, which we loved! Then I saw this recipe for "Sweet Potato Crisps" over at the Carrotsncake blog (which has some awesome "THM-friendly" recipes by the way- go check it out!). The recipe is THM friendly E "as is" (as long as you watch your portion-size, we'll discuss this more later) However, another recipe came to mind that I loved in the past.
 
 
This is the second time I'm bringing up a Rachel Ray recipe, I love her! She had a recipe for potato pancakes, that have a wonderful smokey taste from some added smoked gouda cheese. I decided to incorporate a little of that Smokey flavor here as well! (I still have an idea of trying a vegetable pancake with smoked gouda that would be S- friendly in the future)
 
So without further ado, here we go!
 
Ingredients
 
2 sweet potatoes, grated
1/2 cup egg whites
1 cup Parmesan cheese
1/2 teaspoon rosemary 
2 tsp smoked paprika spice
1/4 teaspoon pepper

 
Preheat oven to 425 F. You will be baking these on a wire rack set on top of a jelly roll pan or a cookie sheet. I used a very small amount of melted coconut oil to grease the wire rack.
 
 
Yeah, sooo not a gourmet chef. And yes that's old Teflon, and no I don't ever bake directly on it. Someone want to by me some nice stainless steel cookie sheets?
 
 
 Grate sweet potatoes by hand or in a food processor.


 Place in a bowl and squeeze out and remove as much liquid as you can. Add remaining ingredients and stir well.


Form into golf-ball sized balls. (I just used my hands for this part, Mine seemed to need a little squeezing to hold firmly together) Flatten and place on a wire rack over a cookie sheet.
 
 Ready to go in the oven, artistically taking the picture close up from the side so as to avoid showcasing my ugly cookie sheets =)


 Bake at 425 for about a 30- 45 minutes. My disclaimer is I am in the South, it was very humid and I use a propane stove. So you basically want them to look like this, however long that takes for your climate and oven.


Serve with Greek yogurt.


I gave one of these to each of my kids, not really expecting them to enjoy them. As a rule, my kids dislike most anything with the word "potato" in it (so "fries" are the exception here LOL) I assumed my eldest, who is by far my most adventurous foodie, would finish what the other two left (after they licked all the Greek yogurt off- my kids tastes are weird) But actually they all loved these and asked for seconds! So that's two sweet potato meals that they all ate some of! Yeah for vitamin A! =)


This will make a decent amount of pancakes. I got around 24 out of this recipe. This is a lot of Parmesan cheese which has, on average about 1.5 grams of fat per 2 tsp. I looked it up online and found there are 48 tsp per one cup, which bring our fat up to 36 grams per the entire recipe. Split that 24 ways and you've got 1.5 grams of fat per cake. If you want to keep your fats under 5 grams to keep this an E you would be able to have 3 of these, anymore and you are into crossover territory. (Disclaimer: It's a running joke in my house how poor my math skills are. I *think* I added the fats up right, but if someone with better math skills than me sees an error, please let me know in the comments!) If you want to serve this as a crossover for your kids or husband, it would be really easy to just add full-fat sour cream on top. (We just had it as a snack so I wasn't super worried about it with my kids)  


Print-Friendly Version
 

Ingredients
 
 
2 sweet potatoes, grated
1/2 cup egg whites
1 cup Parmesan cheese
1/2 teaspoon rosemary 
2 tsp smoked paprika spice
1/4 teaspoon pepper

 
Preheat oven to 425 F. You will be baking these on a wire rack set on top of a jelly roll pan or a cookie sheet. I used a very small amount of melted coconut oil to grease the wire rack.Grate sweet potatoes by hand or in a food processor.Place in a bowl and squeeze out and remove as much liquid as you can. Add remaining ingredients and stir well. Form into golf-ball sized balls. (I just used my hands for this part, mine seemed to need a little squeezing to hold firmly together) Flatten and place on a wire rack over a cookie sheet. Bake at 425 for about a 30- 45 minutes or until slightly browned at the edges. Serve with Greek yogurt. 

 
linked up at Trim Healthy Tuesdays 
and

Monday, November 18, 2013

The Purpose of This Blog and a Mommy Testimony

      So now that I have been up and running for a little while, I've been really thinking about my intentions and purposes while blogging. Everyone has an opinion, and there are lots of voices out there sharing, some kindly, others ... not so much.


     For one, I do believe I have things to share! My opinions and methods may not be unique, but I have ideas and systems that have made my life easier, my family healthier and my stress-level lower. I desire to share those types of things with more than just the people I know off-line, and pray that they can help more women.

     I also believe that as Christian women, we have a mandate to embolden woman younger than ourselves to teach what is good and kind, to encourage self-control and purity, to promote industry, and to help them become better wives and mothers.(Titus 2:3-5)


     However, several recent conversations with friends as well as posts on blogs that I admire have encouraged me to write this "disclaimer post", if you will. Any blog has limitations and mine is no exception. The written word is limited, because the emotion behind the words can be misinterpreted.

There is a tendency online, even more than in real life to misinterpret, to lash out in anger without taking the time to fully read and try to see a point of view different than your own, and to insult any viewpoint that you disagree with. So here is my attempt at giving you a little insight into who I am and how I see things.


FOOD!   
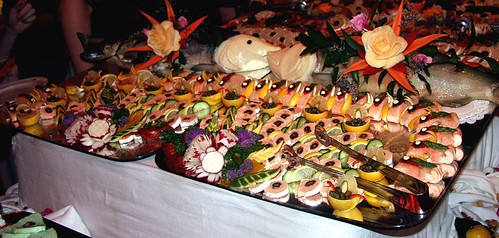
     Pictures- Pictures can be misleading. I love taking beautiful pictures of outdoor scenery, beautiful food, adorable pictures of happy families, children and babies. It's easy to look at someone else's picture and think "Wow! She's got it all together! Her home is beautiful, her kids are obedient, her dinners are 5-star restaurant quality" Whether my own pictures have conveyed any of those thoughts or not is up to interpretation, but here's what I will tell you about what goes on "behind the scenes".

      I am a left-handed, right-brained creative-loving person. =) Organization is NOT natural to me. My house is often messy, sometimes down-right dirty, and while I do absolutely promote organization and cleanliness, know that I do so "from the trenches", not because I have achieved either of these goals fully myself! My pictures are taken in a small "picture studio" that we use and a nice camera that takes really great up-close shots. There's often a mess that I am "editing out" of the cooking progress shots. =)
   Parenting- When I first became a parent in 2005, I was very prideful. I had worked extensively with children before becoming a parent, had waited the "prescribed" 5 years into marriage before becoming a parent and was sure I was going to take the world by storm with my amazing children who would show everyone how it should be done. (okay, maybe I didn't exactly think of it that way at the time, but looking back that's how it feels LOL)

      My first son was an easy baby in many ways. He slept well, he loved his swing, he would lay on a blanket on the floor contently for quite sometime (maybe my house was just quieter!). I was a "natural-minded" parent. I cloth-diapered, wore my baby in carriers, made his baby food from scratch, used natural remedies when he got sick. I still do many of these things now, but my attitude has changed. I used to tell everyone I knew about "the right way" to parent, to comfort, to feed their babies. There was no Facebook back then but if there was, I'm sure I would have been the mom constantly bombarding other mom's with articles on the right way to do everything! (I'm really glad there wasn't a Facebook back then! LOL)

     My second baby was born, and I realized something. "I" wasn't this great, amazing parent who had it all figured out!! I thank God for my little "humbler" who taught me through excessive screaming that some babies refuse to be comforted, and this is not always a reflection on what way they are parented. He taught me that some babies HATE being restricted in a carrier and will scream any time they are placed in one (and believe me I had them ALL and tried them ALL) and he taught me that babies do blow out their diapers, even in cloth, some babies do better in disposables (and depending on where you live and how often you have to use the dryer, no cloth is NOT always cheaper).

     He also taught me that some toddlers hit, not because they were parented with anger, but because they naturally have a inclination towards anger. I'm not excusing allowing your child to go around and hit people by any means! Merely stating that some children will take longer to train to stop hitting than others. He also taught me about a lovely thing(insert ironic face here) called breath holding spells, where a child stops breathing when they cry, turns pale, eyes roll back in their head and they pass out! Nothing like watching your one-year old turn pale and go limp in your arms to bring up your blood pressure!

      By the time he was 8 months old, I was a wreck of a mom and completely humbled from my former pride. It was a time of reformation for me as a mom and for our family as a whole! We turned back fully to God, we improved how we related to each other as a family and I got myself organized to maintain my sanity! Since then we have found how true these verse are:


"There is a time for everything,
    and a season for every activity under the heavens:
     a time to be born and a time to die,
    a time to plant and a time to uproot,
     a time to kill and a time to heal,
    a time to tear down and a time to build,
    a time to weep and a time to laugh,
    a time to mourn and a time to dance,
   a time to scatter stones and a time to gather them,
    a time to embrace and a time to refrain from embracing,
   a time to search and a time to give up,
    a time to keep and a time to throw away,
     a time to tear and a time to mend,
    a time to be silent and a time to speak,
   a time to love and a time to hate,
   a time for war and a time for peace." Ecc .3:4-3
     I want to be an encouragement you as a mom. Maybe I can help you avoid some of the pitfalls I faced, and maybe I can just remind you that your not the only one facing them! I want to remind you, and me, to keep striving, keep working toward becoming a better wife and mom, but never assume that means I'm there having achieved success or that I believe I have the one perfect method that will solve all your problems!

     And finally, no matter what I want you to understand that my intention is never to encourage you that if you try hard enough, work long enough, or believe enough you will achieve anything. NO! It is Christ who strengthens us, who gives us our gifts and even who sends us our trials. Not everyone will achieve health, not everyone will achieve "worldly" success, and sometimes the best laid plans fall to pieces before our eyes. I want to inspire you to lean on Christ through the good times and the bad, to have the courage to do what's best for your family even when it goes against the current and to use the Bible as your guide to life.


“My grace is sufficient for you, for my power is made perfect in weakness. Therefore I will boast all the more gladly about my weaknesses, so that Christ’s power may rest on me. That is why, for Christ’s sake, I delight in weaknesses, in insults, in hardships, in persecutions, in difficulties. For when I am weak, then I am strong. 2 Corinthians 12:9-10

Friday, November 15, 2013

The Old Schoolhouse Magazine Nov/Dec Issue Review

     Wow! We have been having a very busy week this week, it's always amazing to me how active and busy we are even though we have been home all week! Lots of activity and industry going on in these four walls! I've been asked by The Schoolhouse Review Crew to share with you my review of the free publication put out by The Old Schoolhouse Magazine.


     Their current issue, The Old Schoolhouse Magazine (November/December), is currently available at www.TOSMagazine.com and www.TOSApps.com. If you haven't checked out this great magazine for homeschool families yet, go click on one of those links and check it out (have I mentioned my favorite word enough yet? It's FREE!)
     I admit that I have been one of the reluctant ones when it comes to switching from actual books and magazines to digital versions (my husband would tell you I whined about it) I think it may stem from me being a very visual learner, I like to flip back and forth, highlight and use post-it notes and yes, sometimes I even like to flip to the last chapter of a book and find out what's going to happen! But here's what I can tell you about The Old Schoolhouse's online magazine, It's very visually friendly! They have a great tab section on the left-hand side that has "in this issue", "search" and "help" features. I particularly appreciate the "in this issue" tab that lets you easily click back and forth between articles. It was also very easy to zoom in and out to read the smaller type. And on the top of the screen there is a pull-down menu to let you quickly skip to a different page. I couldn't read the words when the page fit the screen, but it was easy to zoom in and read the articles. A few features of a digital copy of a magazine that are actually better than the hard copy (Did I just say that? Shh! Don't tell my husband!) are: 1.) You can click on links right from the magazine and it will take you to the website! I am always seeing curriculum or ideas I am going to want to research later, so I love being able to click the link and add it to my favorites folder right away! 2.) This magazine is 180 pages long!! No paper magazine could afford to add that much content so you are getting more with the digital version! Still not convinced? Don't worry, you can still buy the paper version of The Old Schoolhouse Magazine here.
    This magazine comes with lots of articles on a variety of subjects. Some encouraging, some educating, many sharing Biblical wisdom with you about homeschooling. I particularly enjoyed "Learning to Love Silence and Solitude" by Sheila Campbell which encouraged you to teach your children about the benefits of taking some quiet time for reflection. The introvert in me loves to spend time in silence, I hope my children learn to appreciate it as well! 
     I also was excited to read, "Using the Library to Create Your Own Curriculum" by Mary Hood, Ph.D. (this was a multi-part article with the current topics being Science and Social Studies). The library is where a large part of our homeschooling curriculum derives from, so I was interested to read some strategies to help make this continue to function well in our home. I was contemplating at the beginning of this school year that I needed to find more tools for Social Studies and Science, since our focus has largely been learning to read and honing our beginner math skills. I appreciated Mary saying, "For Social Studies, it is acceptable to pick topics that are of interest without regard to any particular sequence." We have gone from studying ancient Egypt, and similar cultures last year, to starting on the Revolutionary War this year. (largely due to the interests of my older sons). Sometimes, you need another more experienced homeschool mom to say, "Don't worry that idea CAN work long term." especially when you are still a pretty new homeschooling mom like me!
     There are also some great articles that will give you something to learn about with your children. I enjoyed, "Happy Birthday, Verdi and Wagner!" by Karen Haid, which gives a great overview of these two operatic composers and some of their similarities and differences. It's a great read for some study on music appreciation and history (especially if you pair it with listening to them here!) 
One thing that I would have enjoyed being able to do was to directly link an article to a social media site to share something that spoke strongly to me. This was not able to be done directly, but I did find that there is an email feature that will share a direct link to an article, and if you send the email to yourself you can use the link to share via social media.
If you need encouragement, inspiration or some practical education ideas as a homeschooling mom (or dad!), definitely check out the Old Schoolhouse Magazine online!

Friday, November 8, 2013

First Birthday Celebration

We don't do a big party for birthdays in our family. We do celebrate together as a family and we try to all come up with ways to make it special for the birthday child. For a one year old, we think of things we can do that they will enjoy. We pull out the expandable tunnel and the kids crawl through together, we sing together, and today I will be making some "edible" playdough for them to smash (and taste) together. And of course we will be making a cake. For the older kids, the tradition is for them to help make the cake with mom, but for a one year old the other kids help while the baby naps =). I also try to make a picture slide show of the baby's first year.
This slide show is different from the other's I made in some ways. We have been through a lot together as a family in the last few years. Job loss, home loss, major move, major sickness, many financial struggles, lots of crazy "this thing broke and you won't believe what we had to do!" stories. Through it all God has been incredibly faithful to us- we have seen Him miraculously step in over and over (and over!) This time last year I was facing a C-section for the birth of my fourth child. It was my first C-section after three natural births (two of which were homebirths). The stress of the move and our circumstances had caused the baby to be breech and we had tried EVERYTHING to get him to turn, with no avail. I believe strongly in the importance of natural, intervention-free birth. I believe often that a hospital can cause more problems by intervention than it solves, so facing a C-section, not because I was sick, but simply because there was no care provider in my state who would allow for a breech delivery, was difficult to accept. But accept we did, and we found the best hospital in the area for having a C-section (which happened to be and hour and a half away) and we schedule the surgery. The two songs I picked for the slide show were the songs we played over and over in the car on the way to the hospital for our final appointments. We had scheduled care for our older children, packed our bags and were ready to leave our house in the morning to go to our surgery appointment. But God had other plans! I woke at 2am and raced to the bathroom. Having had my water break suddenly to start labor for all three previous deliveries I had a split-second warning that woke me up and told me I had to MOVE. I sat in the bathroom for a moment in an absolute PANIC realizing how fast my labors typically are, how far we had to travel and that all the kids were with us! Then I shook off the panic and started running (well, waddling REALLY FAST)! Thankfully, we had everything packed and the kids were already dressed (because we had planned an early morning start). And so I ended up with a 4 am emergency C-section. However there were benefits to this I didn't see at first. One of the problems I feared with a scheduled birth was that the baby wouldn't be ready to be born at the time of surgery (which can cause various problems). I didn't need to worry about that now since the baby already made it very clear he was ready to be born! (and almost made it out before the doctors made it in to get him!) I also knew that traveling through the birth canal is very beneficial for the baby, both because of the beneficial bacteria that it receives which can help protect it from disease in its first weeks, and because the squeezing from contractions and the passage through the birth canal helps to clear the baby's lungs. Thankfully my baby was able to receive both of these benefits as well, even though he was born by C-section! And finally, I was very determined that once he was born I would not use any narcotic drugs because I was breastfeeding and wanted to assure that the baby would be receiving the best colostrum I had to offer. Again I was so thankfully that God gave me the strength to endure the pain with nothing more than Tylenol (and my own supplements, homeopathics and herbal supports). I'm sure people have looked at our family and wondered why we would choose to have a baby during the midst of a tumultuous time for us. We believe that God timed this little man perfectly. He has been a little ray of sunshine during our darkest hours. His snuggles and dependence on Mommy has kept me sane, made me sit still, and reminded me how nothing lasts forever, whether joy or pain. And watching his older siblings love on him reminds me of the joy that comes from serving others and how we are at our best when we aren't thinking about ourselves. I pray this encourages you today to endure in times of hardship and not to wish for a different life that God didn't give you, but to find joy in the one you have!

This post is linked up at Womanhood with Purpose and Happy and Blessed Home 

Wednesday, November 6, 2013

Teaching Your Left-Handed Child to Write

 photo left-handed.jpg


     My background before I became a stay-at-home wife and mom was in Occupational Therapy. I was a COTA/L, and worked often in elementary schools working with children on their handwriting. I am also left-handed myself and have a left-handed son. (maybe two, the baby is too young to tell!) When I was in college and we were learning about teaching proper handwriting, two of the things I learned were:  one, I hold my pen completely "wrong" and two, often people believe that to teach a left-handed person to write you just need to take whatever a right-handed person does and reverse it!

      One of the techniques we were taught for teaching children who were having a hard time holding their pencil correctly was to use an inclined surface (something similar to this). As a lefty, this made no sense to me! Writing on the board as a child or any other inclined surface was extremely cumbersome to me and certainly did not improve my penmanship!

The "correct" way to hold your pencil (if you are right-handed) is to make the "OK" sign with your hand, pinch the pencil between your pointer and thumb and then drop the other fingers down.


this stock photo shows what I am saying, although normally your hand would be a little more "compact" and your pencil at less of a wide angle from the desk.
 
Now one of the first things that any OT worth her salt will tell you is that this is only necessary to correct your grasp, if you are experiencing a problem with your handwriting. If your handwriting is neat (or at least legible), you can keep your words on the line, and you don't experience cramping or excessive fatigue in your hand, but you hold your pencil completely "wrong" don't worry about it!! Your grasp is functional!
Here's my main problem with teaching a left-handed person to write the same way as a righty. When you are right-handed, your hand is in front of what you are writing. You can see your work and your hand will not smudge what you've just written. If you are left-handed and you hold your pencil the same way, your hand will always be covering what you just wrote and you will constantly be smudging and smearing the side of your hand through your work. Here's a few tips of my tips for helping your left-hander to write:
1. Don't use shaped pencil grasps! These types of molded pencil grips only work if you hold your pencil in the approved way! They can be great for right-handed kids (my right-handed son uses one!) or lefties that have somehow adapted to holding their pencil just like a righty and have beautiful penmanship (my mother-in-law is one of these people! She defies all my thoughts on lefties- she holds her pen just like a righty, never smudges her work and has very envy-worthy penmanship!).
this is as awkward as it looks!
 
 A pencil grip is useful to either correct a grip that isn't working well or to help teach a child to loosen their grip (holding a pencil to tightly will certainly cause pain and fatigue!) I would choose a grip like this one or this one for a lefty as they will help loosen the grip without forcing the fingers into a particular position.
 
2. Allow your child to turn her paper. The most comfortable way for me to write neatly is to turn my paper at a 45 degree angle so I am writing "up" the page rather than "across" it. Don't force your child to have their paper straight in-front of them, it maybe making their penmanship worse!
3. Use spiral bound notebooks backwards! Spiral bound notebooks were made for right-handed people. (I'm convinced) the spiral binding is in the absolute worst place for someone who is left-handed!
The world is ruled by right-handed people! =)
 
 By simply flipping the book to the back cover and starting from there it will be much easier for your left-handed child to avoid that uncomfortable position!
 

Much better! A win for lefties everywhere!
 
For all children, learning to write can become somewhat tedious. Try to incorporate lots of pencil practice that doesn't involve copywork. My oldest son (who isn't a lefty, but DOES need to work on his fine motor skills) loves the Ed Emberly drawing books and also this series of "How to Draw" books. Switching up your writing "mediums" can help as well! Oil pastels are a particular favorite of mine. They require a gentle touch (which can help with kids who push down too hard!) and the colors are very vivid!
I hope these few ideas help you with your little lefties. Please feel free to ask specific questions you may have in the comments!