Wednesday, December 18, 2013

Sourdough English Muffins- E

 photo SourdoughEnglishMuffinPin.jpg     
      Have you tried making your own sourdough yet? I have been working with my own sourdough on and off for about three years now. What first turned me on to learning more about sourdough was reading about it in the Nourishing Traditions book, which I HIGHLY recommend if you do not already own a copy!! Sourdough bread has many health benefits! It  has been shown to reduce the Phytic acid in grains. Phytic acid is the substance that God place in all grains to prevent them from sprouting prematurely. It's what gives them the ability to be store long term (which when you think about it is a wonderful blessing, especially where there isn't modern refrigeration, etc.).


     The problem with Phytic acid is that it also prohibits you from absorbing many of the nurtrients in whole grain foods as well. Sourdoughing solves this problem by minimizing the phytic acid in the flour as it sits and slowly rises. Which means that the amount of nutrients you receive from eating sourdough is much higher than in regular whole grain foods. 


     Sourdough is also easier to digest, partially breaks down some of the glutens , making it easier to digest for people with gluten sensitivity (NOT a gluten allergy like Celiacs). Don't like the sourdough tang? Well THIS recipe is perfect for you then, since we add baking soda at the end. "Soda sweetens" which means it looses the tangy flavor of traditions sourdough, without loosing the benefits! 


     You need to have an active sourdough starter to complete this recipe, if you have a friend who does sourdough that would be a wonderful place to get some starter! (I was blessed enough to have someone who shared with me after our big move, since our starter didn't make it through the 104 temp on our journey to the South ) If not, a starter is simple to make either by collecting your own wild yeast from the air or by buying a dried starter and rehydrating it. Your starter should have been fed within the last twelve hours.


Ingredients: 
(the night before)
1/2 cup sourdough starter
1/2 cup almond milk
1/2 cup filtered water
2 cups whole wheat, spelt, or rye flour

(to be added in the morning)
1 tsp Truvia
1 tsp unrefined sea salt
1 tsp baking soda
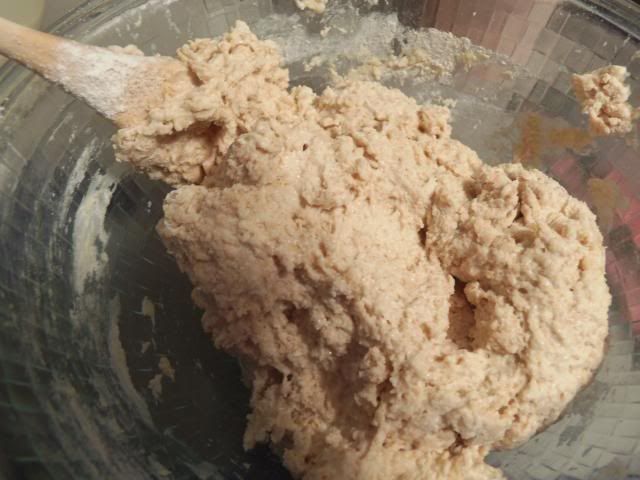

 photo 100_1540.jpg


      Mix the first three ingredients together in a glass bowl with a wooden spoon. It's important to use a non-reactive bowl and utencil for sourdough, so NO metal bowl or aluminum utencils! Your dough should be sticky but not wet.
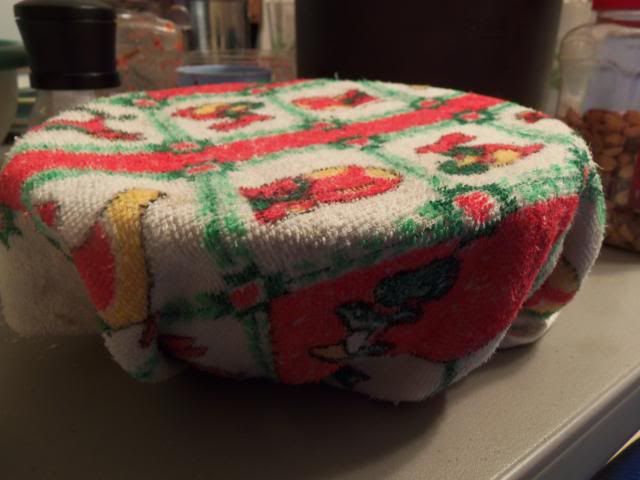
 photo 100_1541.jpg

 Cover with a towel and leave to sit out overnight (or atleast 8 hours) NOTE: I live in a warm climate and a poorly insulated home! In the summer sometimes my kitchen is in the mid 80's to low 90's all night (and a few month of the year its in the 40's inside overnight), this dough CAN sit out up to 24 hours and still be fine, however I would not recommend more than 8-12 hours if you are in a very warm season or climate. If you need to have it sour longer than that for whatever reason, I would probably let it sour in the fridge for 24 hours. If you live where it is in the 60 or 70's in your home overnight (or have better climate control than us LOL) then up to 24 hours on the counter is fine. You may also need longer souring time if your house gets very cold overnight.


     In the morning, your dough should look slightly risen. (NOT risen like a yeast dough, just slightly more puffy)
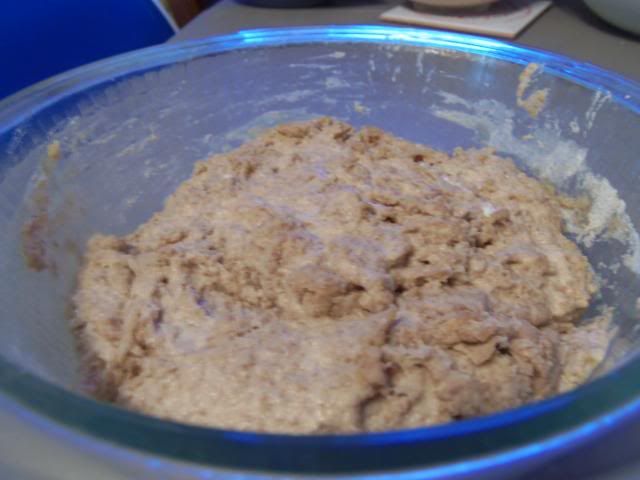
 photo 100_1542.jpg


     Add the Truvia, salt and baking soda, and stir to incorporate well. At this point I heat up my cast iron griddle on the stove top to medium. A frying pan would work as well, however, I like the cast iron because I do not add any oil and the English muffins do not stick (make sure your pan is hot before you put the dough on it) Slightly flour your hands and break the dough into 6 equal pieces. It WILL be sticky and it will slightly stick to your hands. Just try not to handle it too much. =) Roll and flatten into English muffin shapes and place them on the griddle.
 photo 100_1545.jpg


Cook until slightly browned on the bottom (about 7 minutes for me, but this will vary with your type of stove and cooking surface). Flip them over gently and cook them for 5 minute on the other side.

 photo 100_1546.jpg

I finish them by placing them in the oven at 350 for a last 5 or 10 minutes to make sure the insides are fully cooked.
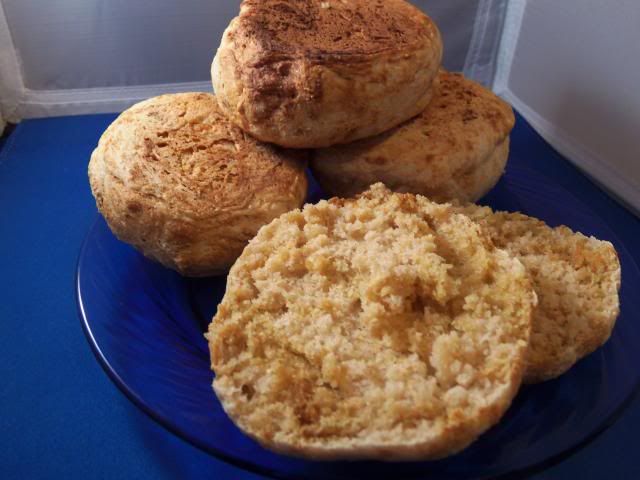
 photo 100_1550.jpg


Sourdough will have a slightly marbled coloring to it after it's cooked. This is totally normal and due to the distribution of the sourdough starter through the flour. I use a little All-Fruit with fiber Jelly on mine to keep it an E meal. If you are not doing the Trim Healthy Mama diet or are at goal weight, then I recommend some yummy grassfed butter on top! For my kids, I do grassfed butter and raw honey, as the amylase in the honey is excellent at helping you to digest grains.
I hope you try this THM version of English Sourdough Muffins! Please feel free to ask questions or let me know how it went in the comments!


 photo 100_1551.jpg


This post may contain affiliate links. This is disclosed in accordance with the FTC regulations.


Monday, December 16, 2013

SchoolhouseTeachers.com Review

 photo ST-Affiliate-300x300_zpsb38aa8ae.png     

     I am very excited to share that I have been chosen to join the 2014 Homeschool Review Crew from The Old Schoolhouse Magazine. I will be able to share with you my reviews of lots of great homeschool products and here is my first, a yearly membership option with SchoolhouseTeachers.com.


     SchoolhouseTeachers.com is an online school Christian curriculum that provides a blended learning style. If you are not sure what that means, don't worry! Neither was I, I had to look it up. =) Blended learning is simply combining on-line instruction with more traditional off-line teaching methods (reading, worksheets, activities/experiments). SchoolhouseTeachers.com does this by providing video instruction, downloadable activities as well as giving well thought out plans for you to teach your children on your own. It truly is a full curriculum, with resources such as reading, literature, art, science, math, geography, character studies, more than 50 subjects total!


     Since my children are all preschool through elementary school age, this was the section of the website that we tested out ourselves (although there are resources for Preschool through High School available). My children were eager to try something new and wanted to test EVERY category! We didn't quite meet that ambitious goal, but we got a general impression of the website to share with you.


 photo 100_1533.jpg

    
     We first enjoyed our free e-book together (there's a new one to download every month!) This month was discussing energy. My second grader really enjoyed learning more about electricity. He's an avid "Magic School Bus" book fan and so he had recently read the book that explained how electricity is created. This e-book was sort of the next step in learning more about energy, and I was glad he had the basic understanding to build upon as he worked on learning some new concepts.
    
     My preschooler enjoys clicking around on the animated books provided. They were the perfect level for someone just learning how to operate a mouse or keypad, with large stationary items to click on and watch. The reading that they worked on was more on level for my kindergartener.


     We also enjoyed the lapbooking section as well, and read this month's selection of the Gift of the Magi. This story had some very difficult vocabulary in it and I was surprised at how well my second grader still understood the story's theme! I was glad for a stretching lesson for him and have printed out the lapbook templates to work on later.


     We also worked on an art lesson together, this weeks lesson was about watercolors and using different techniques for hard edges and soft edges. All three of my bigger kids enjoyed practicing with water colors and their new technique.


 photo 100_1534.jpg


     Occasionally, you will be asked to provide additional materials to complete a lesson (art supplies, a book from the library, etc.) but the majority of the work is provided for you right on the website. They even have a whole section of sensory activities for toddlers, which I am looking forward to exploring more!


      Membership costs $139 for a full year. One membership provides for your entire family! You do not need to purchase anything additional for multiple children.


 photo schoolhouseextras_zps3a20c85f.jpg      SchoolhouseTeachers.com will certainly provide you with a lot of resources to either supplement your current curriculum, or stand on it's own to provide for everything you need!. We do not have a high speed internet connection (we don't have dial-up but our satellite is limited and we can not stream video or audio often without going over our monthly data limit very quickly) This did limit our use of certain portions of the website (for instance, the science experiments were all video based, with no accompanying text, so we had to skip that). If you have a slow internet connection, it will be something you'll want to take into consideration before purchasing. However, there still were PLENTY of things we could use and participate in, even with our data limits.

     We enjoyed (and will continue to enjoy) our membership to SchoolhouseTeachers.com If you have any questions you would like to ask, feel free to leave me a comment below and I'll be happy to answer to the best of my ability!


Click to read Crew Reviews


Crew Disclaimer

Thursday, December 12, 2013

Putting on The Spirit E-book Review and Giveaway

 photo PuttingontheSpiritLaunch_edited-1.jpg


"A one month devotional Bible study on the fruit of the Spirit offering busy moms hope and a practical way to feed their souls in those short snatches of quiet time during their busy days."


Does that sound appealing to you? Me too! So when I was offered the chance to receive a free copy of Katie Hornor's new ebook
"Putting on the Spirit: Ten Minute Devotions for Busy Moms " I was happy to say YES!
From her website:


     "Katie and her husband Tap have been missionaries in Mexico since 2007. They homeschool their four children and minister through church planting, Bible training, bookstore ministry, and homeschool curriculum development.

     Katie is a teacher at heart, and by trade, and loves to encourage women in their God-given roles through speaking, writing and blogging. She is the author of this and two other ebooks (at the date of this printing) as well as the Lemonhass homeschool curriculum for Spanish Speaking families."

     So in other words, Katie knows what its like to be a busy mom! This devotional book goes through each of the 9 Fruits of the Spirit and spends 2 to 3 days exploring them further and helping you apply them to your real life. Love ,Joy, Peace ,Long-Suffering (Patience), Meekness (Kindness), Goodness, Faithfulness, Gentleness, and Temperance (Self-Control). Each devotional can easily be completed in just 10 minutes, or if you happen to be a mama with a little more time than that you could certainly explore each verse and explanation further.

     Katie has some practical suggestions about how to fit in time with God in our busy schedules. She explains here:

    
"You and I are very busy moms, but we do have time for the Word
in small increments—waiting for the kids in the carpool line,
nursing the baby, waiting at sports or instrument practice, during
nap time, during lunch break at work, just before dinner, or just
after putting the kids down for the night. It is possible for each of
us to find ten minutes a day to spend with the Lord, clothing
ourselves in his Spirit."


     This devotional will encourage you to seek to use God's methods to deal with the heart issues of everyday life. It has bless me to focus on the Fruit's of the Spirit more fully and to share more of how each "fruit" can be applied in daily life and be taught to my children as well.
     There also is a free workbook that goes along with the book you can download it here. The Kindle version of the book is .99 cents through tomorrow (12/13) and then $4.99 after that.
     And if you would like to win your own copy, Katie has graciously allowed me to give away THREE PDF copies here on my blog! So please enter through the rafflecopter widget below!


a Rafflecopter giveaway


 photo POTSdisclaimer.jpg

Tuesday, December 10, 2013

Trim Healthy Tuesdays : Boston Baked Beans E

 photo IMG_2493.jpg


Here's another recipe that was made THM- friendly for my hubby. =) Baked beans were a major favorite of his. Of course with hot dogs, which will make this a cross-over if you have a big plate of beans, but if you keep it to a small serving can still be an S friendly meal.


Ingredients:
1 can navy beans, drained
2 strips turkey bacon
1/2 a small onion (I have also used just onion powder)
3T sugar-free maple syrup
2T tomato paste
1 tsp molasses
2 tsp Truvia
1 tsp mustard
salt


     This recipe is so simple!! Just first heat the turkey bacon.(I cut it up into small pieces first so I don't have to remove it and do this after) If you add the turkey bacon first, you don't need to add any additional oil for when you add the onions. I add the onions in when the turkey bacon has started to sizzle a little. Once these are mostly cooked through, add the rest of the ingredients and stir well on medium heat.

 photo IMG_2484.jpg
     This batch has been doubled to feed everyone in my family and have leftovers for my husband's lunch.


When everything is heated through it's ready to serve!!
 photo IMG_2488.jpg


          Beans are a carb so that makes a large portion of this (say a cups worth) in the E category. If you want to pair it with some all-beef hotdogs, then you need to keep your serving at closer to 1/4 cup to keep your carb limit under 10 grams (and probably skip the onions and go for onion powder instead). Of course if you just want to make it a cross-over special meal (or you are at goal-weight) then enjoy!! This recipe will not taste EXACTLY like the baked beans you are used to, but it's very good and certainly satisfied my cravings and my husbands as well! Hope you enjoy it too! I'd love to hear back from you in the comments if you try it and enjoy it!


 photo IMG_2490.jpg


This post is linked up on Trim Healthy Tuesdays over at Gwen's nest, go check some other great recipes there!!!


Wednesday, December 4, 2013

Trim Healthy Tuesdays: Garlic Dill Pickles and a Quick and Easy Eggnog Smoothie FP

 photo IMG_2630.jpg     
     Here's a quick an easy recipe to add more fermented foods to your life! If you are unfamiliar with all the benefits of adding fermented foods let me share a few with you:
  • The lactobacilli (healthy bacteria) in fermented foods increases the vitamin content and digestibility.
  • These beneficial organisms produce antibiotic and anticarcinogenic substances as well.
  • Our gut is our bodies first line of immune defense, building the beneficial bacteria in your gut strengthens your immune system.
  • Fermenting vegetables also increases their enzyme content which helps us digest the other foods we consume with fermented foods more easily.
  • The bacteria that makes us sick is everywhere, it's unavoidable! The only way to keep ourselves healthy is by keeping those harmful bacteria in proper balance by ensuring we have a healthy and well-functioning immune system!
     There are lots of different fermented veggies recipes out there. I highly recommend the book Nourishing Traditions if you would like lots of healthy fermented food recipes! Trim Healthy Mama also recommends fermented foods and has a chapter devoted to them.

     Let's quick talk about one of the ingredients before I give you the recipe: whey. Whey is simply the liquid you see sitting on top of your yogurt! If you make your own yogurt cheese or greek/strained yogurt, you are familiar with whey. If not, the simplest method to obtaining some yourself if to buy a plain yogurt from the store (NOT greek yogurt, and it must have live active cultures- check the side of the package).


      You can strain it using cheesecloth (if you get the cheep kind from Walmart you'll need to double or triple it up since the weave is very open) or a nylon mesh bag (found in the painting section of Home Depot or Lowe's- it should say 100% nylon) you'll need about 4 TBS for this recipe and I simply put about 2 cups of yogurt in my mesh bag, a gently squeezed out the amount of whey I needed. Then add the yogurt back to the container and mix it back up (it will be slightly thicker since you've removed some liquid but not much!)


     To contain your pickles, I used a qt. sized ball jar and a flip top lid glass contain (also about a quart) because that's what I had! If you have a 2qt ball jar or 2 ball jars those will work as well. You need a well fitting lid! There are really cool fermenting lids for wide mouth ball jars, that are on my "I want to purchase some day" list, but you can totally make this work with just a regular jar! The containers need to be very clean. You don't want any bad bacteria competing with the good bacteria (in the form of whey) that you are using to ferment your cucumbers. I usually boil water and then pour it in the glass jars for about five minutes. Then remove the boiling water and set upside down on a clean paper towel until they aren't hot to the touch. 

Let's move on to the recipe!


Ingredients:
4-5 pickling cucumbers or 2-3 large cucumbers
1 tbs mustard seed
5 fresh garlic cloves chopped
2 Tbs pickling spice (coriander, dill seed, allspice, red chilies, bay leaves, cinnamon)

3 tbs. fresh dill, chopped

1 tbs unrefined sea salt

4 tbs whey

Filtered water

Slice cucumbers in thick rounds


 photo IMG_2626.jpg


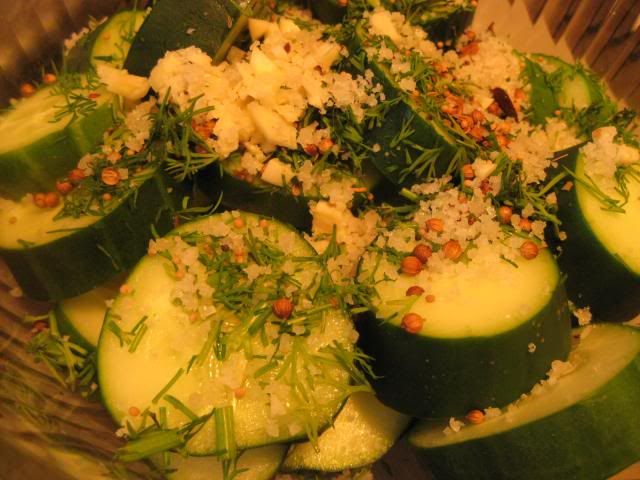
Place in a bowl and add spices, garlic and salt. Coat pickles with seasoning.

 photo IMG_2627.jpg


     Place cucumbers and spices equally in your containers. (they should be full but not smooshed) Pour whey equally in each container (so if you have two equal containers that are equally full of cucumbers they should each get 2 tbs of whey). Pour in filtered water until the pickles are covered . Cover the jar and give it a few good turns to make sure the whey and salt is evenly distributed.


 photo IMG_2630.jpg

   Now this needs to sit at room temperature for 2 days to ferment! Because I don't have the fancy fermenting lid, about once a day (twice a day if its really hot, above 80 in your kitchen) I loosen the lid and allow any trapped gas to escape (I do not FULLY open the lid, just unscrew enough to hear the air escape and then screw it back on. This prevents pressure from building up inside the jar.

     Because this recipe only ferments for two days, the chances of a broken jar because of trapped gas is very slim, but if you are concerned you could place the jars in a small Rubbermaid tub while they ferment. Once they have sat for two days , they can be store in the refrigerator. (I recommend refrigerating for at least 12 hours before you eat one for full flavor!)

     Cultured foods can last a very long time once refrigerated (or canned) because the lactobacilli keeps them from going bad. Also this recipe has the added benefit of having a number of ingredients that inhibit bad bacteria from growing (garlic, bay leaves, mustard, cinnamon).

      In all honesty, I am the main person who eats these in my house. My children all have a small piece that I cut from a large round with their meals (because Mommy says they must!) I am hoping overtime they will learn to enjoy the flavor more (like they have with many other foods that I have introduced them too in the same way). My husband doesn't enjoy pickles, however he will eat fermented beets and fermented ginger carrots that I make, so I don't worry about it! (if you are interested in my version of either of those recipes let me know in the comments!) I really love the pickle flavor myself and try to make sure I eat one or two every day (as long as you stay to one or two rounds these stay in the FP category for THM)
 
     I hope you enjoy these too and enjoy the health benefits that ferment foods bring as well!


Eggnog photo: eggnog eggnog.jpg
 
    And now for my quick eggnog smoothie!! Gwen over at Gwen's nest posted a great eggnog smoothie recipe already! But I get up at 6:30 in the morning to make a smoothie for my husband before he goes to work. If you are like my husband, and wake up chipper and full of energy then following a recipe may work for you first thing! I am NOT a morning person. My sweet husband has my cup of coffee ready for me when I trudge out of bed and mumble "morning" at him as I make my way to the kitchen. =)


      He LOVES eggnog and in years past we would go through a number of containers of it between Thanksgiving and Christmas! So I knew I had to come up with an easy way for him to have it regularly during this holiday season.
     
      I make a vanilla smoothie, the same method as the Chocolate Frappa in the book (you could follow my recipe here and leave out the Dandy blend and caramel flavor, and add in the vanilla) but with no cocoa powder, I add Swanson's Vanilla whey protein too for added vanilla flavor. Then I add 1 tsp vanilla nut flavoring (you could add a little extra vanilla if you don't have this) and 2 tsp of ground nutmeg. That's it! Tastes like eggnog and so easy! Hope you love it too!


This post is linked up on Trim Healthy Tuesdays at Gwen's nest